


















Building Materials for an Outdoor Kitchen
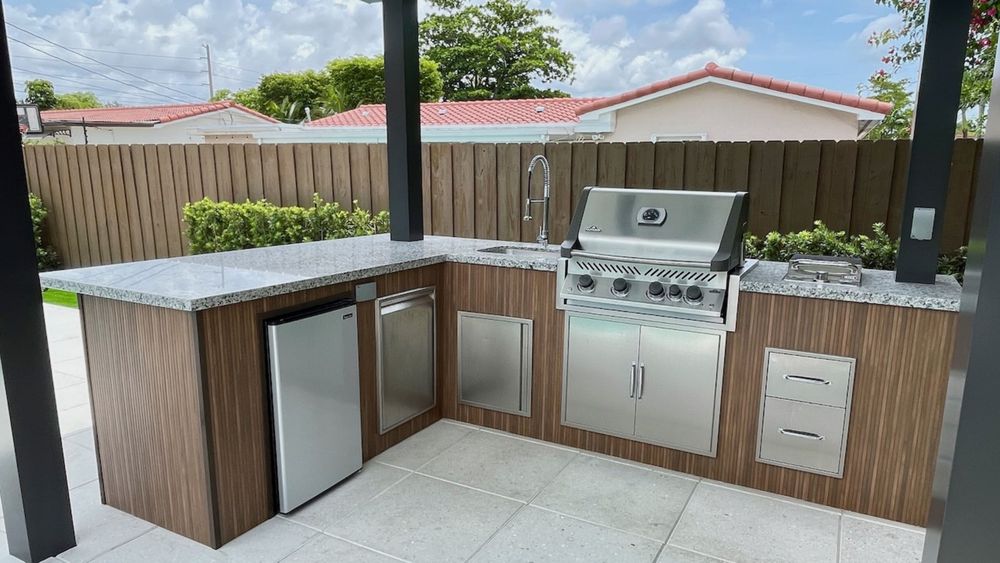
A fantastic outdoor kitchen doesn't just happen with a high-end grill. Its true durability and long-term performance hinge on one critical element: the underlying frame. Skimp on this foundation, and you're inviting problems down the road – from shifting countertops to compromised cladding. This guide dives deep into outdoor kitchen frame construction, focusing on the engineering and material choices that deliver exceptional longevity and stability.
The Foundation of Longevity: Material Selection
Your choice of framing material dictates much about your outdoor kitchen's resilience against the elements, pests, and the sheer weight it needs to support.
Galvanized Steel Studs: The Professional's Choice
For an outdoor kitchen built to truly last, galvanized steel studs are often the superior choice. Unlike wood, steel won't rot, warp, or become a meal for insects. It's non-combustible, offering an additional safety advantage, especially around grilling areas. Steel provides an incredibly stable and consistent frame for heavy countertop materials like granite or concrete, as well as dense masonry veneers.
When selecting steel, opt for:
- 18-gauge or 16-gauge galvanized C-channel studs for vertical supports and horizontal framing where significant load or attachment points are needed. Lighter 20-gauge studs are generally not recommended for primary structural framing in an outdoor kitchen due to the demanding environment.
- Galvanized track (U-channel) for top and bottom plates.
- Corrosion-resistant fasteners: Use self-tapping, exterior-grade screws specifically designed for steel framing. Stainless steel or ceramic-coated screws are critical to prevent rust and maintain structural integrity over time. R.P. Lumber can source a variety of galvanized steel framing components and fasteners suitable for these demanding applications.
Pressure-Treated Lumber: A Reliable Alternative (with Caveats)
While steel offers ultimate performance, pressure-treated lumber remains a viable option, provided you understand its limitations and specific requirements for outdoor kitchen use. If choosing wood, always select ground contact rated lumber (typically identified as .40 CCA or similar, suitable for direct ground burial) even if your frame won't be in contact with the ground. This provides maximum protection against rot and insects.
Crucially, every cut end on pressure-treated lumber must be sealed with a copper naphthenate wood preservative. This re-establishes the chemical barrier compromised by cutting and prevents moisture wicking. Fasteners must be hot-dipped galvanized or stainless steel hardware to resist corrosion from the treatment chemicals.
Keep in mind that even pressure-treated lumber can warp or twist as it dries, which can impact the flatness required for countertops or the application of a masonry veneer. While more economical upfront, careful selection and additional bracing might be necessary compared to the inherent stability of steel.
Engineering for Performance: Construction Techniques
Building a durable frame goes beyond material selection; it’s about precise execution.
Square, Level, and Plumb: Essential Accuracy
An outdoor kitchen frame must be perfectly square, level, and plumb. This is non-negotiable for seamless appliance installation, a uniform countertop support, and proper adhesion of any exterior cladding.
- Anchoring: Secure the bottom track or plate directly to your existing concrete patio or slab using concrete anchors (e.g., 3/8-inch wedge anchors or sleeve anchors) or epoxy anchors. Ensure the anchors penetrate at least 2 inches into solid concrete.
- Leveling: Use a long level and shims (composite or treated wood) to ensure the bottom plate is perfectly level before erecting studs. Verify the top plate is also level across the entire structure.
Structural Reinforcement for Heavy Loads
Outdoor kitchens often support heavy appliances, weighty countertops, and potentially thick cladding.
- Stud Spacing: Frame on 16-inch centers for optimal support, especially if applying stone veneer or heavy stucco.
- Blocking and Cross-Bracing: Install horizontal blocking between studs to stiffen the frame and provide solid attachment points for appliance mounting, drawer slides, and interior shelving. Cross-bracing can prevent racking, which is crucial for overall stability.
- Appliance Cutouts: Frame all appliance openings with additional studs and headers/sills to create robust, square apertures. Ensure these frames are designed to bear the weight of the appliance. Don't forget to account for future utility lines.
Integrating Utilities and Ventilation
Planning for gas, electrical, and plumbing lines must happen during framing. Create specific pathways or cutouts in your studs (within allowable limits for structural integrity) to accommodate these, ensuring they are protected and accessible. Adequate ventilation is paramount, especially for enclosed grills or refrigerators. Include venting panels in your design to prevent heat buildup and maintain appliance efficiency.
Weatherproofing and Longevity Considerations
Beyond the frame itself, consider how your construction protects against moisture. Ensure proper site drainage away from the kitchen base. If cladding with stone or stucco, install a weather barrier (like a house wrap) over your frame before applying lath and mortar, creating an additional layer of moisture protection. The inherent weather resistance of galvanized steel minimizes concerns about the frame itself, but protecting the entire assembly is key.
A well-engineered outdoor kitchen base using the right materials and construction methods ensures your investment stands strong for years to come. Stop by any R.P. Lumber location and speak with our knowledgeable staff about selecting the ideal galvanized steel studs, appropriate pressure-treated lumber, and corrosion-resistant fasteners for your outdoor kitchen frame construction project. We're here to help you build it right.