
























Late Summer Siding & Window Repairs
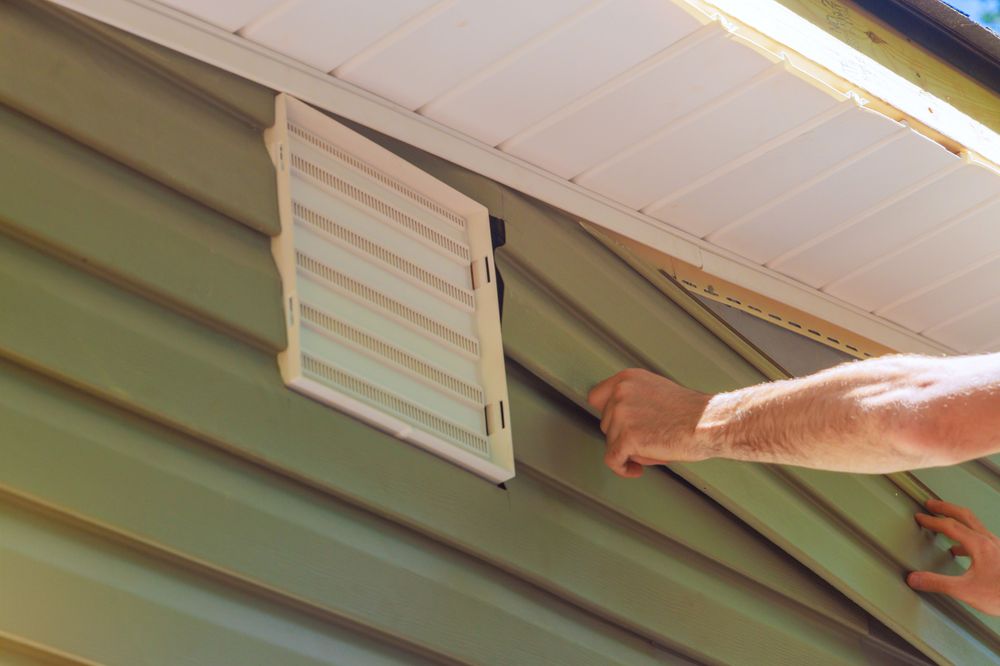
That small crack in your siding or the draft you barely notice around a window now might seem minor, but come winter, these issues escalate quickly into major headaches like increased heating bills, structural rot, or even mold. The stable temperatures and drier conditions of late summer offer a prime, often overlooked, window to address these vulnerabilities. Don’t wait for the first frost; a proactive approach to late summer siding repair and window maintenance is your best defense against the harsh Midwest winter. This isn't about a quick once-over; it's about getting hands-on with the right materials and techniques to protect your home’s envelope.
The Critical Window for Late Summer Siding Repair
Addressing siding issues before cold and wet weather sets in is crucial. Sealants cure properly, repairs can be made without battling freezing temperatures, and you prevent small problems from becoming expensive, urgent winter fixes. The goal is to fortify your home's exterior against moisture and air leaks.
Identifying Siding Damage: Beyond the Obvious
Your first step is a thorough inspection. Don’t just look; touch.
- Visual Cues: Walk around your entire home. Look for cracked, warped, loose, or missing panels on vinyl siding. For fiber cement or wood siding, check for paint peeling, blistering, soft spots, or cracks, especially around seams, corners, and window/door openings. Pay close attention to areas that receive the most sun or moisture exposure.
- Tactile Inspection: Gently press on any suspect areas. Softness indicates moisture intrusion and potential rot underneath. For fiber cement, look for delamination or crumbling.
- Moisture Meter Check: For wood or fiber cement siding, a non-invasive moisture meter can be an invaluable tool. Test areas where you suspect water might be pooling or penetrating. Readings consistently above 18-20% indicate a problem that needs immediate attention. You can find reliable moisture meters in the tool department at R.P. Lumber.
Patching and Panel Replacement: A How-To Guide
The repair method depends heavily on your siding type and the extent of the damage.
Vinyl Siding: Quick Fixes and Panel Swaps
For small holes or cracks in vinyl, a vinyl repair patch kit can be a temporary solution. For larger cracks or warped panels, replacement is best.
- Removing Damaged Panels: Use a siding zip tool (also known as a vinyl siding removal tool) to unlock the bottom edge of the damaged panel from the panel below it. Work your way across the panel.
- Accessing Fasteners: Once unlocked, gently pull the panel away from the wall to expose the nailing hem. Carefully pry out the nails holding the damaged panel in place. You may need to unlock and lift the panel above it to access its nailing hem as well, as vinyl siding is installed from the bottom up, with each panel overlapping the nailing hem of the one below it.
- Installing New Panel: Slide a new vinyl panel, cut to the correct length, into place. Hook its bottom lip over the top of the panel below it. Ensure the panel is seated correctly.
- Fastening: Nail the new panel loosely through the center of the nailing slots. Don't nail it tight; vinyl needs room to expand and contract with temperature changes. Leave about 1/16-inch space between the nail head and the siding.
- Relocking: Use the zip tool to relock the top edge of the new panel into the panel above it.
Fiber Cement Siding: Precision Cuts and Sealing
Fiber cement siding, like James Hardie, is durable but can crack if impacted or if moisture gets behind it consistently.
- Cutting Out Damage: For a localized crack or a small rotted section, mark the damaged area in a rectangular shape, extending to the nearest studs or existing seam lines if possible. Use an oscillating multi-tool with a carbide blade or a circular saw with a fiber cement blade to carefully cut out the section. Wear a respirator and eye protection for dust.
- Adding Backing: If the cutout doesn't fall on studs, install blocking (e.g., pressure-treated 2x4s) behind the opening, flush with the existing siding, to provide a nailing surface for the new piece.
- Inserting New Piece: Cut a new piece of fiber cement siding to match the opening precisely. Test fit it.
- Flashing and Sealing: Apply self-adhering flashing tape over the backing and around the perimeter of the opening to create a watertight seal. Apply a bead of high-quality exterior sealant, such as OSI Quad Max or Titebond WeatherMaster Sealant, along the edges where the new piece will meet the old.
- Fastening and Finishing: Insert the new piece and fasten it with siding nails or screws, ensuring they hit studs or your added blocking. Caulk all seams with the same sealant, then paint to match the existing siding. Remember to follow manufacturer-specific instructions for the particular fiber cement product.
Sealing the Envelope: Crucial Window & Door Prep
Windows and doors are notorious for drafts and moisture intrusion. Late summer is the perfect time to inspect and refresh their seals, significantly improving your home’s energy efficiency before heating season.
The Art of Exterior Caulking
Old, cracked caulk is an open invitation for water and cold air. Replacing it is a high-impact, relatively low-cost repair.
- Remove Old Caulk: Use a utility knife or a caulk removal tool to cut and scrape away all old caulk. An oscillating multi-tool with a specialized blade can make this much faster for stubborn areas. Clean the area thoroughly with a wire brush and then a damp cloth to remove any debris or mildew. Let it dry completely.
- Prepare the Joint: For deeper gaps (over 1/4 inch), insert foam backer rod into the joint before caulking. This prevents the caulk from sticking to the back of the joint, allowing it to flex and stretch more effectively, improving durability. The backer rod also reduces the amount of caulk needed.
- Apply New Caulk: Choose a high-quality, flexible exterior caulk like DAP Dynaflex 230, GE Silicone 2+, or OSI Quad Max. Load it into a caulking gun and cut the tip at a 45-degree angle, making an opening roughly 1/4 to 3/8 inch. Apply a steady, even bead along the joint, pushing the caulk into the gap.
- Tool the Bead: Immediately after applying, use a wet finger, a caulk tool, or a putty knife to smooth the bead, ensuring good adhesion and a professional finish. This also helps push the caulk into the joint.
- Mind the Temperature: Most exterior caulks require temperatures above 40°F (and often up to 90°F) for proper application and curing. Late summer offers ideal conditions, ensuring the caulk sets correctly before winter’s chill. Always check the manufacturer’s guidelines on the product tube. You’ll find a wide selection of these specialized sealants in our paint and caulk aisle.
Weatherstripping Wisdom
Inspect the weatherstripping around all windows and doors.
- Identify Gaps: Close a door or window on a piece of paper. If you can easily pull the paper out, your weatherstripping isn't sealing properly. Look for flattened, brittle, or missing sections.
- Types & Replacement: Depending on your window or door type, you might have adhesive-backed foam, bulb, compression, or felt weatherstripping. Replacing it usually involves simply peeling off the old and pressing or nailing on the new. Ensure the new weatherstripping creates a tight seal without binding the operation of the window or door. Effective weatherstripping is key to draft prevention and maintaining your home's thermal envelope.
Preventing Moisture Intrusion: Flashing and Drainage
Beyond just the siding and window frames, consider the areas where different materials meet – these are prime spots for water to sneak in.
Inspecting and Repairing Flashing
Flashing is thin material, usually metal or plastic, installed at critical junctures to direct water away from the structure.
- Key Areas: Check flashing around windows, doors, roof-wall intersections (kick-out flashing), and any penetrations like vents or utility lines.
- What to Look For: Rust, corrosion, bends, gaps, or missing pieces. Even small gaps can lead to significant moisture intrusion over time.
- Repairing: For minor gaps, a high-quality exterior sealant can provide a temporary fix. For damaged or missing flashing, it’s often best to replace the section. This might involve carefully lifting siding or shingles to install new pieces of aluminum or vinyl flashing, ensuring proper overlap to shed water effectively. Use self-adhering flashing tape around windows and doors before installing trim or siding for an extra layer of protection.
Ensuring Clear Drainage Paths
Make sure downspouts extend at least 5-10 feet away from your foundation. Clean gutters are a must. Also, ensure the ground slopes away from your home's foundation to prevent water from pooling against the siding or seeping into the basement.
Taking these detailed steps for late summer siding repair and window maintenance now will pay dividends when winter arrives, protecting your home from costly damage and improving its comfort and energy efficiency.
Don't let these crucial tasks slide. Stop by any R.P. Lumber location and speak with our knowledgeable team about the specific siding repair materials, sealants, or tools you need – we can help you choose the right products for your project and provide expert advice on application techniques.